Before everything
Audience: External Integrators / Developers
In just about 15 minutes, you can connect your system to Optoma Management System (OMS) and begin controlling real devices through APIs.
You’ll start by establishing a secure connection to OMS and pairing your first device. Once paired, you can obtain an API Key that authenticates your requests.
Before interacting with real hardware, you can enable mock mode by setting the header x-mock: true. This allows you to test and understand each API’s behavior safely, without affecting actual devices.
When you’re ready to go live, simply switch to x-mock: false. The same API calls will then operate real OMS-connected devices — completing your integration journey from setup to live control.
Preparation
A. Pair a device
i. On the device → Open “OMS”, note SerialNo
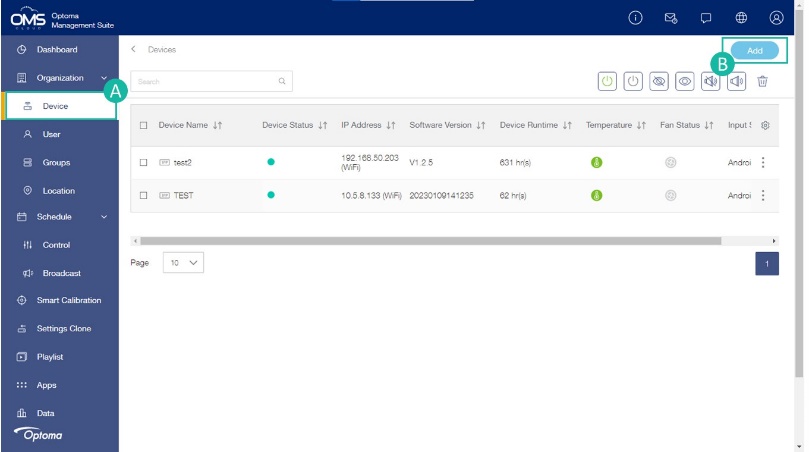
ii. Go to the OMS Portal, Navigate to Device,
iii. Click Add in the upper right corner and follow instructions to add device.
B. Account & Subscription
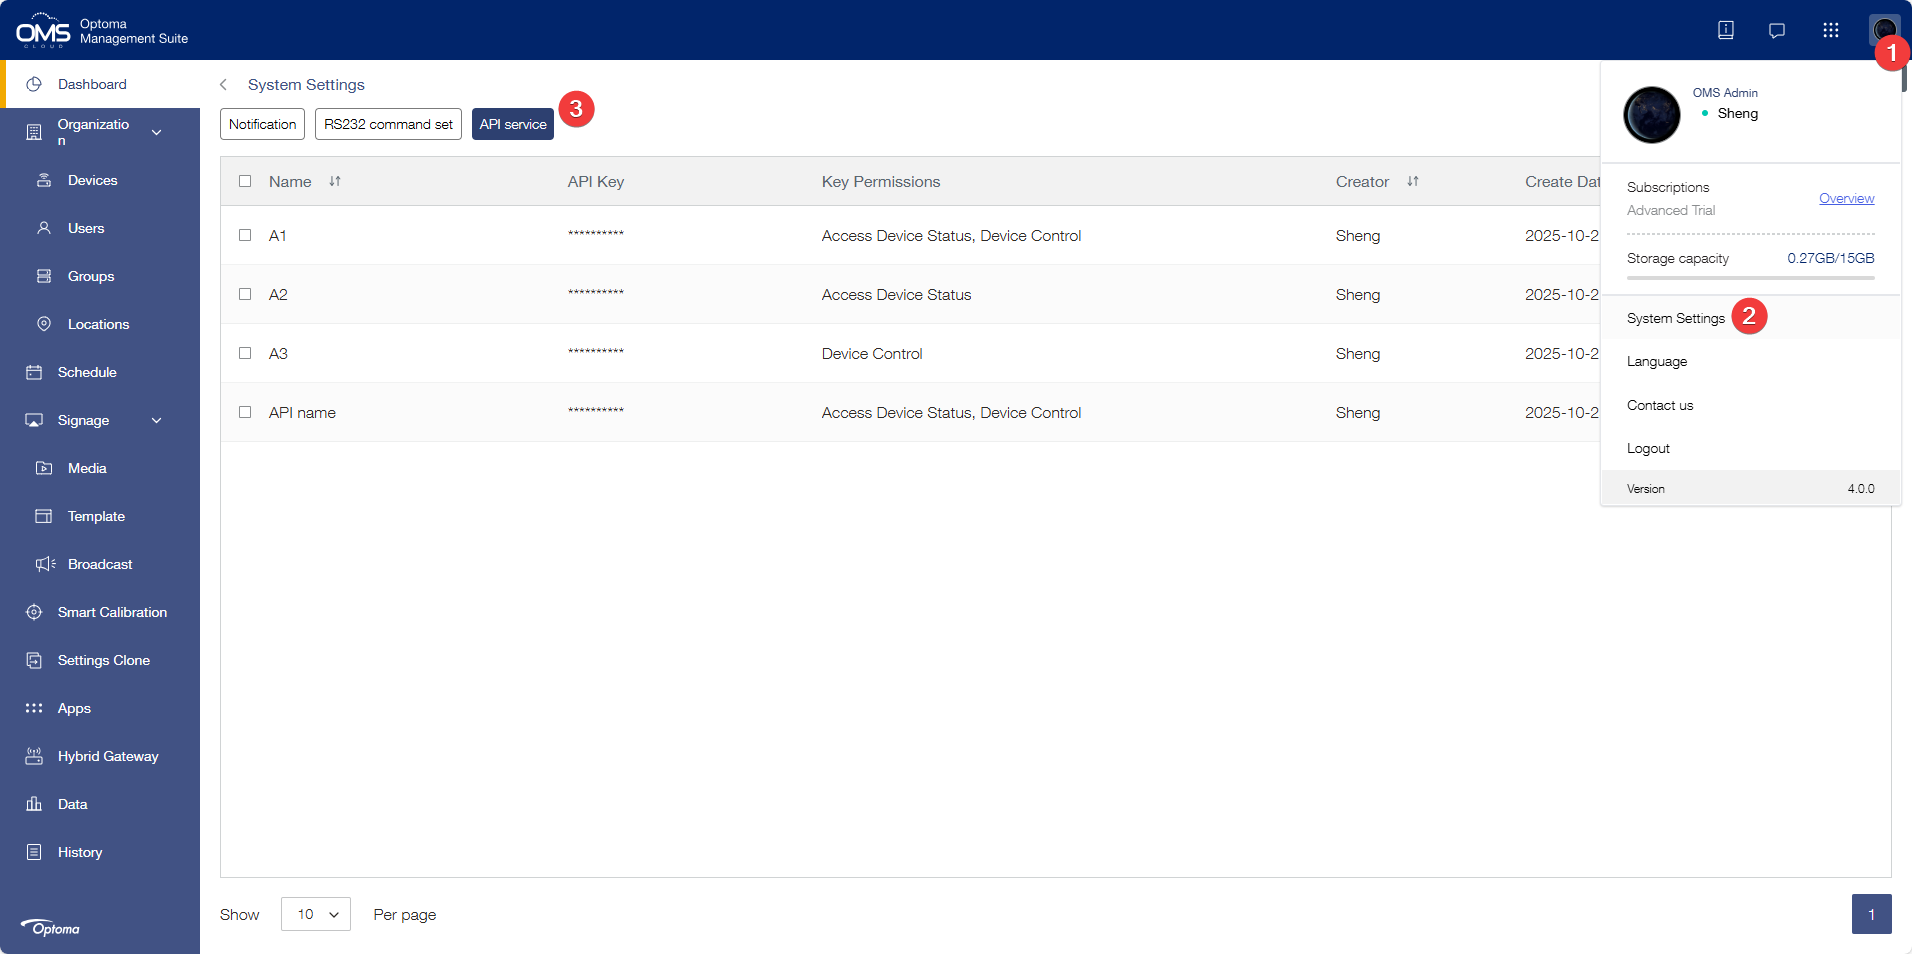
i. Go to the OMS Portal and register/login.
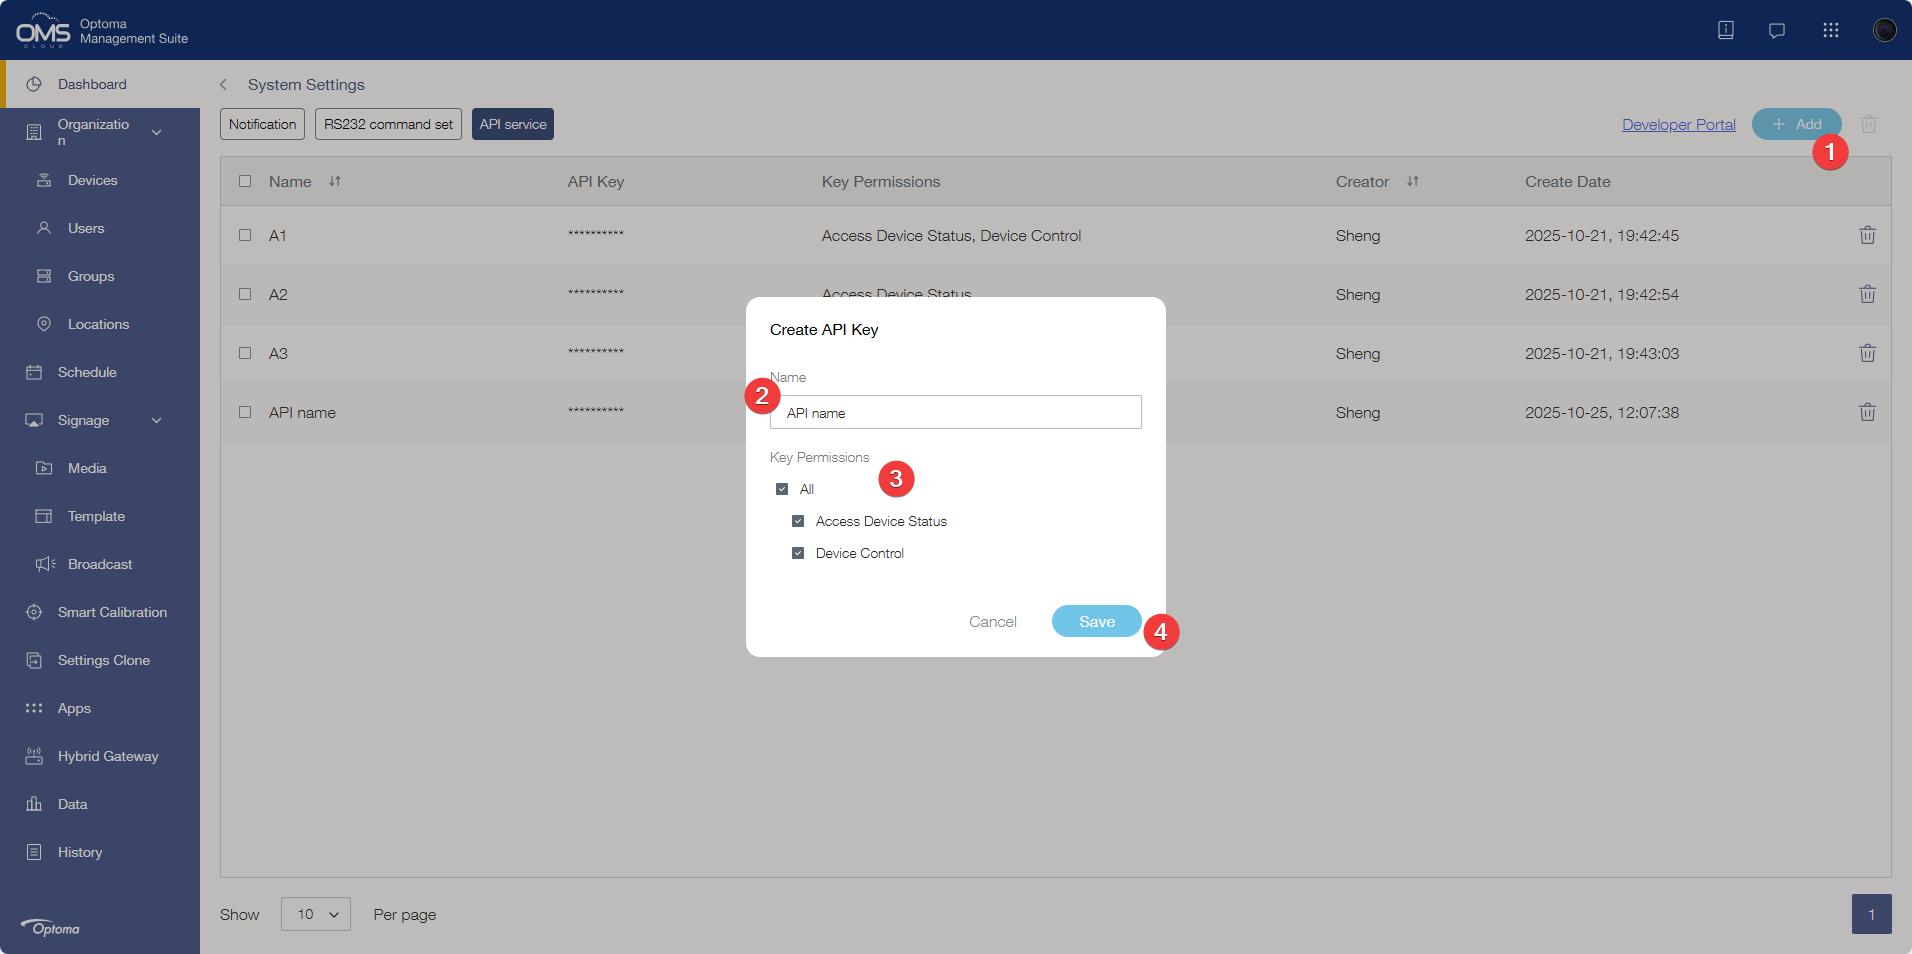
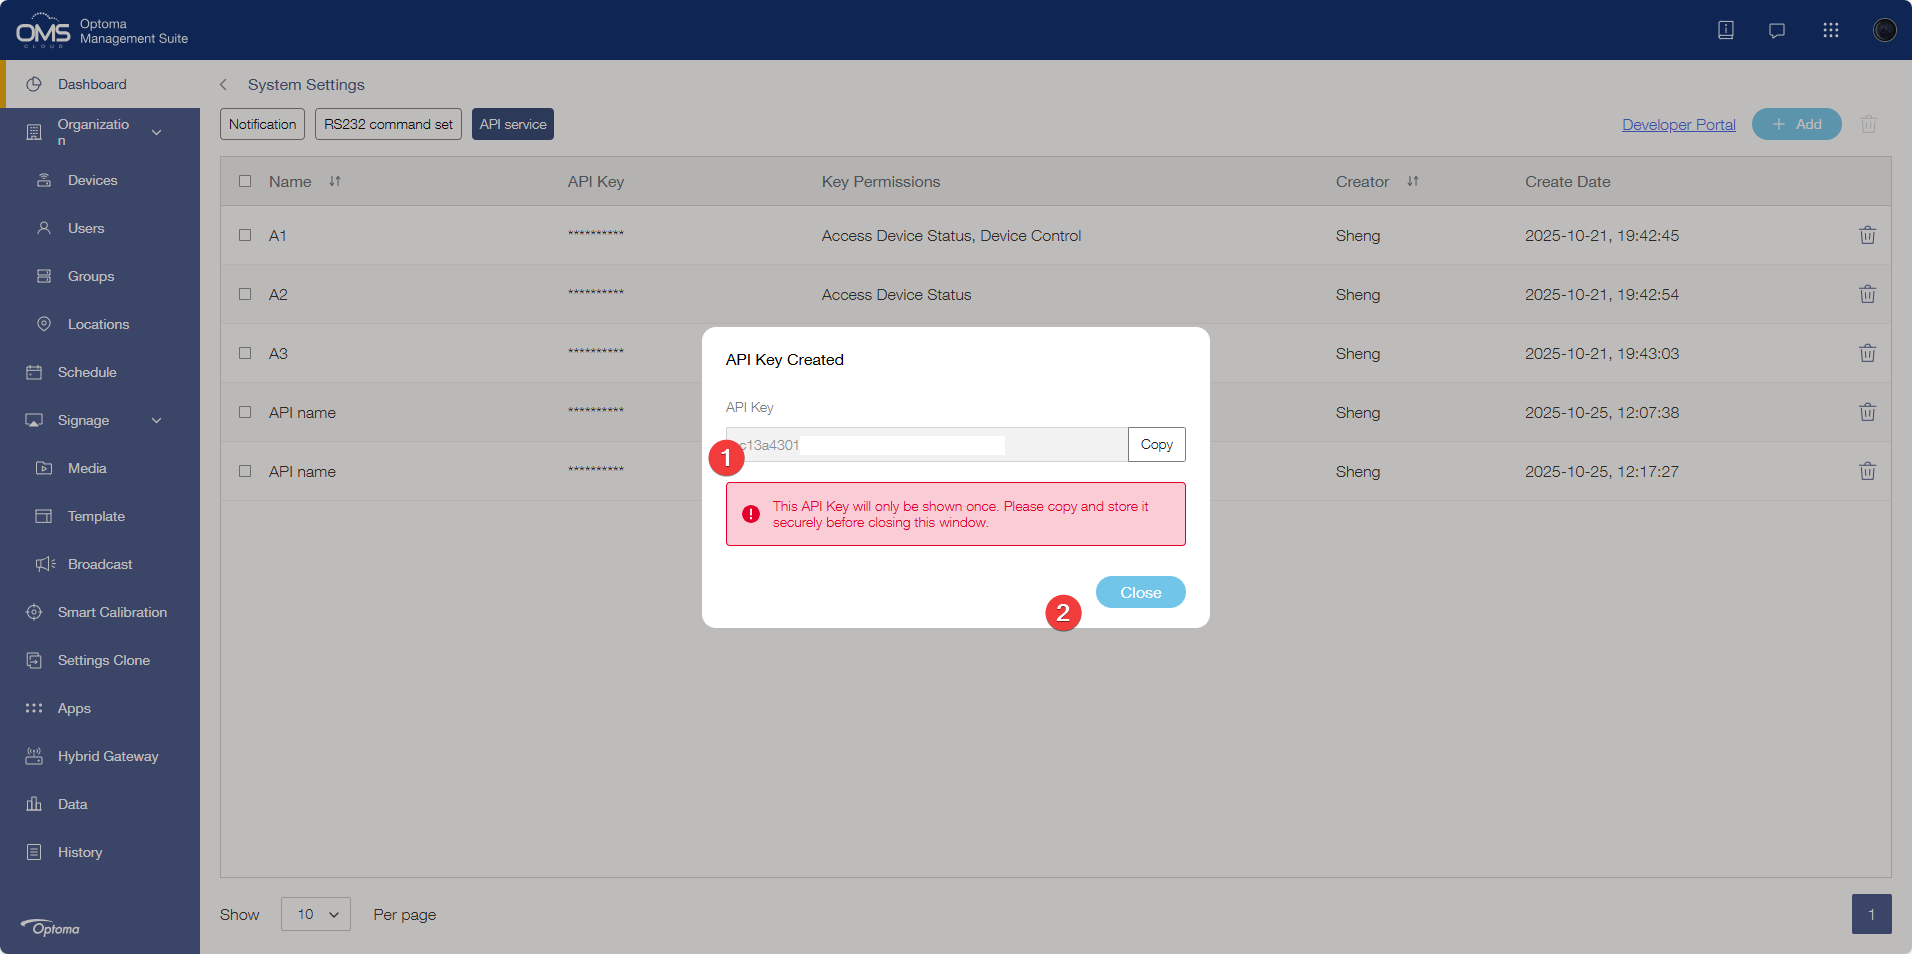
ii. Navigate to API → Create API Key
iii. Choose your Name & Key Permission (API Key).
iv. Copy your API Key and keep it save (important, if you lose it, you need to create a new key)
Your first API call
Now that you have your API Key, let’s make your very first call!
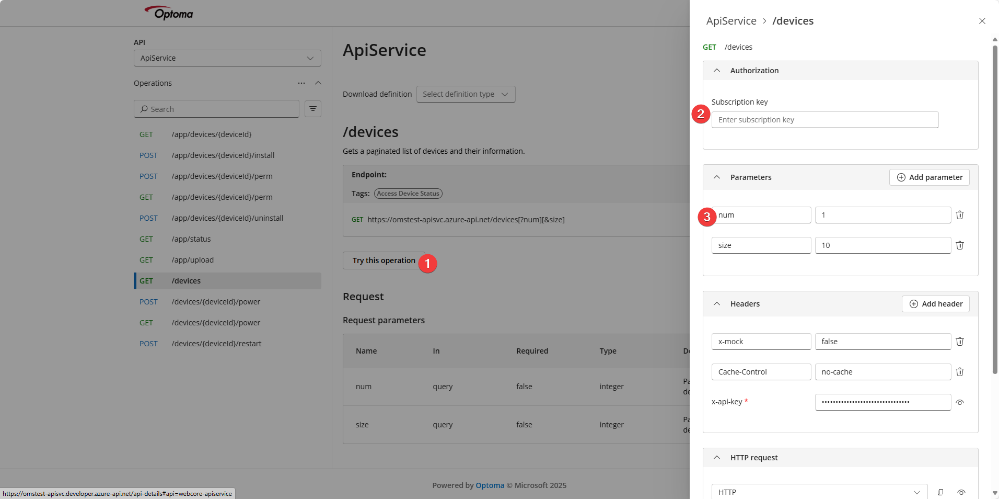
1. Open the OMS Developer Portal.
2. Click the APIs category, then select the /devices endpoint.
3. Click “Try this operation”.
4. Use your API Key in the Subscription key field, it will auto copied to x-api-key, and set other parameters as below.
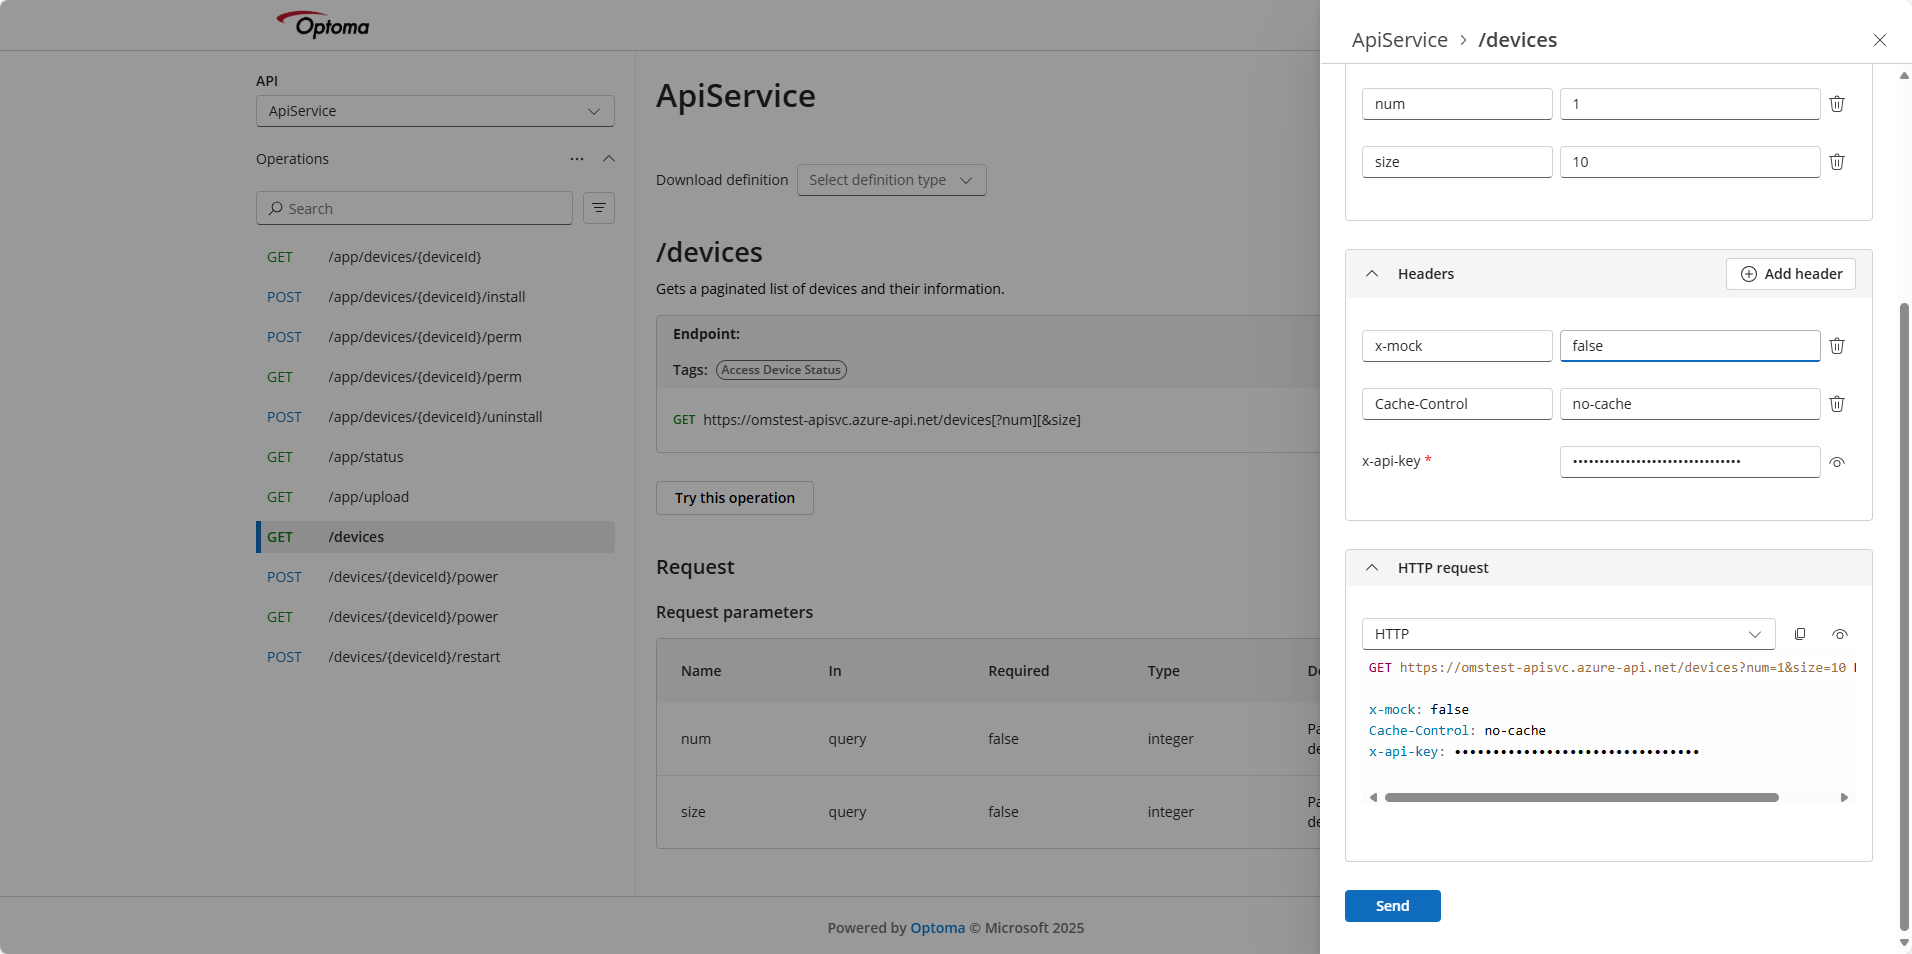
5. Scroll down to the bottom of the page, switch the HTTP Request to HTTP.
6. Hit Send!
Wait just 2 seconds… and you’ll see the real information from your device appear right on the screen. That’s it — you’ve officially made your first live OMS API call!

Integrated with Your Product
Now it’s time to bring OMS into your own system.
Inside the Developer Portal, you’ll find API documentation and ready-made examples.
To start testing safely, keep the header x-mock: true in your API requests.
This enables mock responses, so you can explore and verify how each API behaves without affecting real devices.
It’s a perfect sandbox to experiment and learn.
Once your development and testing are complete, simply remove x-mock.
Now the same API calls will interact with real devices.
This gradual shift from mock to live mode keeps your workflow safe and smooth.
Think of it like training wheels — once you’re confident, you can ride the real bike (your devices) without risk. ✨
Appendix
Don forget these rules
Always include in header
x-api-key: <your API key>
Retry only when you see 429 (rate limit).
Default rate limit: 5 requests per seconds per key.
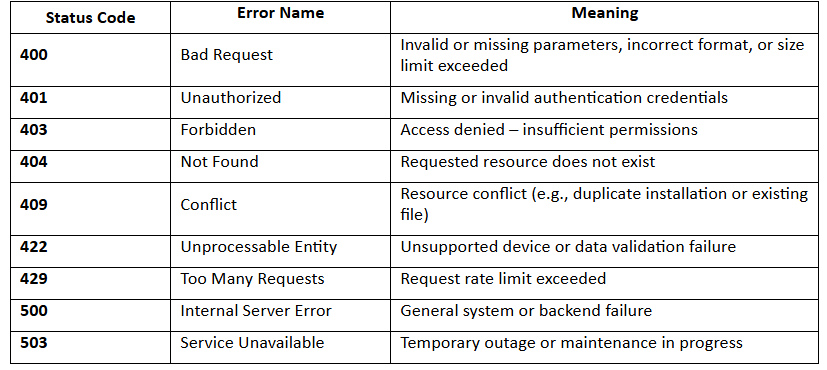
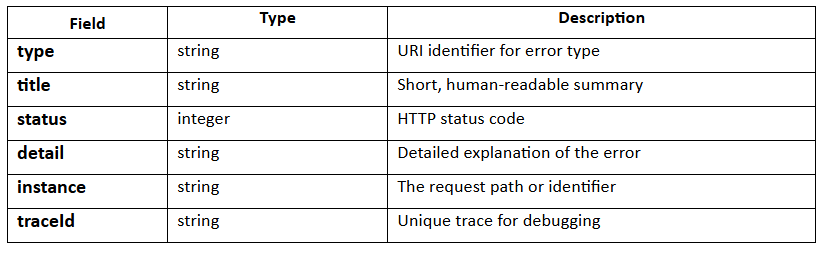
Common Error Model
Common HTTP Error Code